Navigating Densify
Navigating Densify
#380110
Login into Your Densify Instance
Once you obtain your Densify instance details and credentials you can log into the user interface.
- Click on the provided URL.
- You will be prompted to change your password. Follow the instructions provided. See Resetting Your Own Password.

See
When you first log into your Densify instance, you will see the landing page with the option to add connections via the Public Cloud Connections wizard. Use the wizard to collect your infrastructure configuration, workload data and load it into Densify for analysis.
It may take up to 24 hours from the time you create the connection to data being collected, loaded and analyzed. If after 24 hours, there is still no data, or if your subscription or trial has expired, contact Contact [email protected] for details.
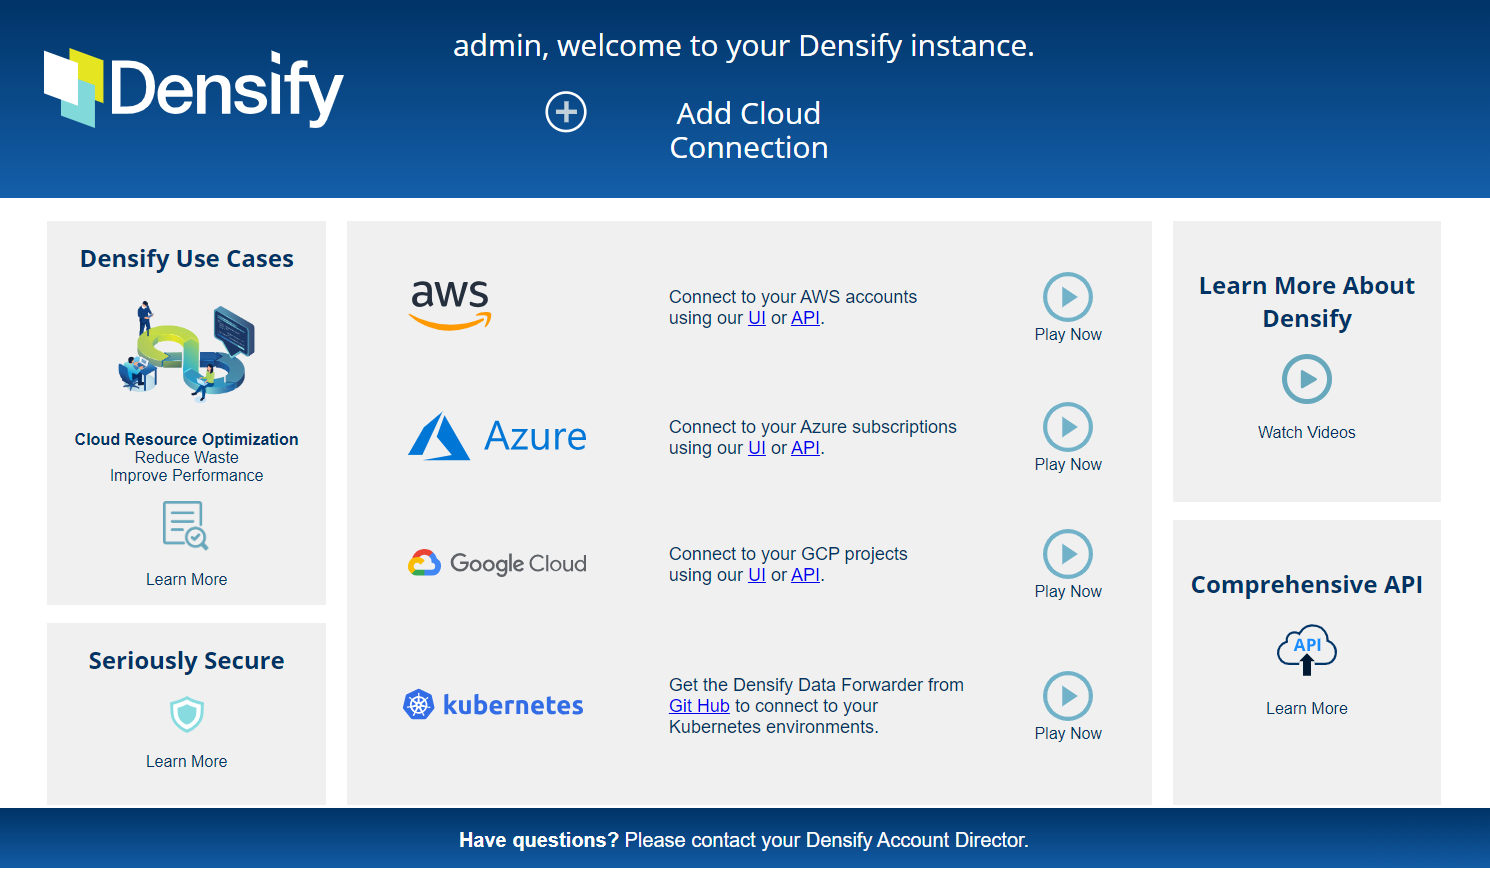
The pre-data landing page appears immediately after you login into your Densify instance for the first time.
The following options are available on this page:
- If you are creating a cloud connection, click the corresponding Play Now button to learn more about specific prerequisites for each of the public cloud options.
- If you want to analyze your container infrastructure, you need to download and configure the data forwarder. Details and the required files are provided in Git Hub.See
If your Densify instance has pre-configured connections, you may see the following, no-data landing page. Contact [email protected] to review the collected data and to proceed to the Densify Console.
Densify Console
The Densify Console is available to all Densify SaaS users after bypassing the initial Densify landing page. A menu at the top of the console provides you with access to features and reports applicable to your Densify user role. The main report content page, filters, settings, and available toolbar items are dependent on the menu feature you select.
The first page displayed after you log into the Densify Console is dependent on the type of data collected in your Densify instance:
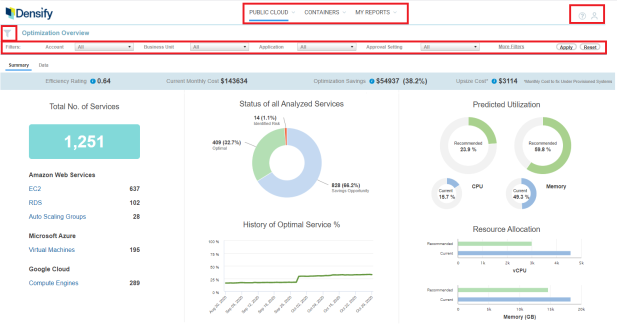
- Optimization Overview—The Optimization Overview Report is displayed if you have public cloud data collected, such as AWS, Azure or GCP infrastructure and workload data. See
- Kubernetes Container Optimization —The Kubernetes Container Optimization Report is displayed if you are collecting and analyzing container data. See
Only the options for which you are collecting and analyzing data are displayed in your Densify Console.
The common features are described below. They appear only when applicable.
The public cloud reports contain some features that are not available on the Private Cloud dashboards and reports.
Table: Common UI Features
|
Feature |
Description |
|
Logo |
The logo image in the upper left corner takes you back to the default landing page. Typically this is the Optimization Overview page for your public cloud environments, but it depends on the type of data you are collecting. |
|
Allows you to navigate to the various features of the Densify Console. The features are grouped into the following menu sections:
In general, menu dropdown items and tabs are displayed only if there is applicable data. For example, with only public cloud data, menu items related to private cloud, demand planning, and automation are not displayed. |
|
|
Allows you to set and control the scope of systems on which most components of the user interface report upon, i.e., reporting, managing of supply and demand, etc. For details, see Using the Global Filter. |
|
|
Allows you to filter guests for reports based on a set of configurable criteria. For details, see Using the Guest Filter. |
|
|
Within a topic page, tabs allow you to navigate to the different views or reports available. |
|
|
Allows you to navigate to a specific page, to the first/last page, or to the next/prev page of a multi-page table or report. The current page is highlighted. |
|
|
Takes you back to the parent page/dashboard. Note: Do not use your browser's Back button for navigation within Densifyas that will close your session. |
|
|
Exports tabular reports to Microsoft® Excel. This icon is only displayed if the export option is available for the displayed dashboard. For details, see |
|
|
Connects to the Densify online help pages. The online help is located on the Densify website. |
|
|
This dialog box provides the following:
|
|
|
Displays the Public Cloud Connections dialog box, to define connection information in order to collect public cloud data. For details, see Using the Public Cloud Connections Wizard. |
|
|
Opens the Recommendation Filter Menu to narrow the results of the current report displayed. For details, see Using the Recommendation Filter Menu. |


Documentation and Training
The Densify help system provides the complete set of Densify documentation in an online, searchable format:
- Densify Online Help—See Using Densify Help for details on using the features in the online help.
- Online Help for the Densify API—Online help for the Densify API. Includes a Postman collection of examples.
- Densify Training—Self-guided, training for basic Densify concepts and features is provided on the training portal.
Last Updated: June 2024
|
|
|
|
|
|
|